Showing posts with label s3. Show all posts
Showing posts with label s3. Show all posts
Tuesday, September 16, 2014
Samsung Galaxy S3 Neo Tips and Tricks
How to Factory Reset and Hard Reset
We have our own reasons why we factory reset our device. Maybe we want to delete all the files and restore the device to its original state. It could also be the device may be malfunctioning or so slow and it needs to be reset.
Restoring the default settings or factory reset your device will delete all your existing files. It is recommended to backup your important files on your computer before attempting to reset your device.
The steps below are the instructions on how to factory reset your device:
Step 1. On your HomeLcd, tap on MENU icon.
Step 2. Select "Settings", then scroll down and tap "Backup and reset" option.
Step 3. Then tap on “Factory Data Reset”.
Step 4. Read warning carefully before tapping the “Reset Device”.
Step 5. If you want to proceed in resetting your device, tap on “Delete All” to confirm the Reset.
Now, you just need to wait while your device is resetting. It should reboot itself and you will have a new start on your Samsung Galaxy S3 Neo+.
You may also use the shortcut method using the code: Enter *2767*3855# on your device.
Hard Reset:
1. Turn off your device.
How to Reduce the Battery Consumption
Battery Life depends on how you use your device. For Samsung Galaxy S3 Neo+ device, if you want to save your battery to last longer hours, you may need to adjust your settings.
All of us want to have a longer battery life on our phones. Follow these suggestions to reduce the battery consumption:
How to Reformat Memory Card
Formatting the memory card on your device will delete all the files that is stored on the memory card. It is recommended to backup your important files on your computer before attempting to format your memory card.
You may not be able to reformat your memory card on your computer. So try it through your device:
1. On your Home Lcd, tap Apps.
2. Select Settings.
3. Go to Storage.
4. Then tap Format SD card > Format SD card.
5. Tap Erase everything to confirm the action.
How to Import Contacts From Old Phone to New Phone (on Sony, iPhone, Samsung, HTC and Nokia)
Contacts is very important for everyone of us. We cant connect to our friends without a contact number. If you have a new phone, saving contacts on the phone one by one is so hassle. But now, theres an easy way how to transfer or import your contacts from your old phone to your new phone.
Use your PC to transfer contacts to your new phone. This process is applicable in several phone brands, including iPhone, Samsung, HTC and Nokia.
You just need an Internet Connection on your PC, your old and new phone and their own USB cable.
If you are not prompted with a pop-up window to install the PC Companion, you can also download the PC Companion here.
How to Secure Your Device with Face Unlock, Face and Voice Unlock, Pattern and Password
How to Upgrade With the Latest Software
Keeping your device updated with the latest software fixes bugs on your handset thus contributing to its efficiency and life span. Samsung allows you to install those updates in two ways- through Samsung Kies or Over-the-Air. Well heres how you can install those latest software firmware using this two methods.
Upgrading with Samsung Kies
1. First launch Samsung Kies.
2. Then connect your phone to the computer using the USB cable that came with it.
3. Now Samsung Kies will automatically recognizes your device and a dialogue box
appears showing the available updates, if any.
4. Click the update button in the dialogue box to start upgrad ting to te latest software.
While youre upgrading the device, you shouldnt turn off the computer or disconnect
te USB cable and dont connect other media devices to the computer as it may interfere
the upgrading process.
Upgrading over-the-air
1. Go the Applications Lcd and then tap Settings.
2. Then go to About device.
3. Select Software Update then hit on Update.
How to Make Your Device a Portable Wi-Fi Hotspot
Smartphones these days can now share its mobile data connection and act as a portable Wi-Fi hotspot. And like those high-end gadgets, Samsung Galaxy S3 Neo+ is sure to let you experience the benefits of making it as a portable Wi-Fi hotspot. Heres how you can make your Samsung phone the next Wi-Fi hotspot.
1. On your device, go to Settings Lcd first.
2. Then tap Wi-Fi and tap for more options.
3. Select Advanced options to customize your Wi-Fi settings.
4. Go to Tethering and portable hotspot.
5. And choose Portable Wi-Fi hotspot to share the devices mobile network connection.
And you now have a portable Wi-Fi hotspot using your device.
How to Activate and Use Multi Window Feature
Computers allow us to do multi tasking by letting its users open various windows or Lcds to work on. Now if you think your phones display is too small for another Lcd, then you are indeed underestimating what your phone can do. With Samsung Galaxy S3 Neo+, you can still carry on with your multi tasking skill by working on not just one window but two Lcds at the same time. Heres how you can activate and use the Multi Window feature on your device.
1. To activate the Multi Window feature on your phone,go to the Applications Lcd first.
2. Then tap on Settings.
3. Go to Display and tick Multi Window.
4. To use the Multi Window just tap and hold and the Multi Window panel appears at the left side of the Lcd.
5. Now select one app and drag another app to a new location. Just drag the bar between the application panels up and down to adjust the panel size.
6. Tap the panel handle to hide or show the panel.
7. To move an open panel, just tap and hold the handle and drag it to an edge of the Lcd.
8. When a panel is hidden, tap and hold the handle and drag it up or down or left or right to move the handle.
9. To deactivate Multi Window, tap and holdagain.
Take note that when this feature is activated, only applications on the Multi Window panel can run. When launching applications which contains multimedia files such as music and video, sound from both files will be played. And this feature may not be available depending on your region or service provider.
How to Install and Uninstall Apps
Read More..
Restoring the default settings or factory reset your device will delete all your existing files. It is recommended to backup your important files on your computer before attempting to reset your device.
The steps below are the instructions on how to factory reset your device:
Step 1. On your HomeLcd, tap on MENU icon.
Step 2. Select "Settings", then scroll down and tap "Backup and reset" option.
Step 3. Then tap on “Factory Data Reset”.
Step 4. Read warning carefully before tapping the “Reset Device”.
Step 5. If you want to proceed in resetting your device, tap on “Delete All” to confirm the Reset.
Now, you just need to wait while your device is resetting. It should reboot itself and you will have a new start on your Samsung Galaxy S3 Neo+.
You may also use the shortcut method using the code: Enter *2767*3855# on your device.
Hard Reset:
1. Turn off your device.
2. Then press and hold Volume Down + Home Button + Power On.
3. Wait for a few seconds until the Factory reset menu appears.
4. Select "wipe data/factory reset" by using the Volume Down button.
How to Reduce the Battery Consumption
Battery Life depends on how you use your device. For Samsung Galaxy S3 Neo+ device, if you want to save your battery to last longer hours, you may need to adjust your settings.
All of us want to have a longer battery life on our phones. Follow these suggestions to reduce the battery consumption:
- Switch to Sleep mode by pressing the Power key when you are not using your device.
- Close any apps or features when you are done using it so they will not continuously running in the background.
- Turn off the network connection if you are out of range so that your device will stop searching for a network signal. (deactivate the Bluetooth feature, turn off the Wi-Fi feature when not in use, etc).
- Deactivate auto-syncing of applications.
- Decrease the backlight time.
- Lessen the Lcd brightness and the Lcd lock timeout.
How to Reformat Memory Card
Formatting the memory card on your device will delete all the files that is stored on the memory card. It is recommended to backup your important files on your computer before attempting to format your memory card.
You may not be able to reformat your memory card on your computer. So try it through your device:
1. On your Home Lcd, tap Apps.
2. Select Settings.
3. Go to Storage.
4. Then tap Format SD card > Format SD card.
5. Tap Erase everything to confirm the action.
How to Import Contacts From Old Phone to New Phone (on Sony, iPhone, Samsung, HTC and Nokia)
Contacts is very important for everyone of us. We cant connect to our friends without a contact number. If you have a new phone, saving contacts on the phone one by one is so hassle. But now, theres an easy way how to transfer or import your contacts from your old phone to your new phone.
Use your PC to transfer contacts to your new phone. This process is applicable in several phone brands, including iPhone, Samsung, HTC and Nokia.
You just need an Internet Connection on your PC, your old and new phone and their own USB cable.
Then you need to install the PC Companion program. This is a free application and the installation files are already saved on your new phone. This program can also be used in updating your phone software.
Please note that if you are using the Microsoft Windows 7 operating system on your PC, make sure that the AutoPlay setting is enabled.
To check your settings:
Click Start > Control Panel, then type "autoplay" on the search box. Click the AutoPlay, and mark the check box Use AutoPlay for all media and devices.
Installing the PC Companion:
Installing the PC Companion:
- Turn on your new Phone and connect it to your PC.
- On your new Phone, tap "Install" to install PC Companion on the PC.
- On your computer, if a pop-up window that appears notifies you about available PC Software, select Run Startme.exe.
- Then click Install to start the installation and then follow the instructions to complete the installation.
If you are not prompted with a pop-up window to install the PC Companion, you can also download the PC Companion here.
Transferring your contacts to your new phone:
- Make sure that PC Companion is installed on your PC.
- Open the PC Companion application on your PC.
- Then click Contacts Setup and follow the instructions to transfer your contacts.
Securing your Samsung Galaxy S3 neo+ is also important, specially if you have a private files that you dont want others to access it. So to prevent others from using your or accessing your personal data without your permission, then you may need to activate the security features. The device requires an unlock code whenever unlocking it.
Setting a face unlock:
1. On the Applications Lcd, tap Settings.
2. Select Lock Lcd.
3. Then choose Screen lock.
4. Tap Face unlock.
Fit your face in the frame to be captured. Then, set a backup unlock PIN or pattern to unlock the Lcd in case the face unlock fails.
Setting a face and voice unlock:
1. On the Applications Lcd, tap Settings.
2. Select Lock Lcd.
3. Then choose Screen lock.
4. Tap Face and voice.
Fit your face in the frame to be captured and then set a voice command. Then, set a backup unlock PIN or pattern to unlock the Lcd in case the face and voice unlock fails.
Setting a pattern:
1. On the Applications Lcd, tap Settings.
2. Select Lock Lcd.
3. Then choose Screen lock.
4. Tap Pattern.
Draw a pattern by connecting four dots or more, and then draw the pattern again to verify it. Set a backup unlock PIN to unlock the Lcd when you forget the pattern.
Setting a PIN:
1. On the Applications Lcd, tap Settings.
2. Select Lock Lcd.
3. Then choose Screen lock.
4. Tap PIN.
Enter at least four numbers, and then enter the password again to verify it.
Setting a password:
1. On the Applications Lcd, tap Settings.
2. Select Lock Lcd.
3. Then choose Screen lock.
4. Tap Password.
Enter at least four characters including numbers and symbols, and then enter the password again to verify it.
Setting a face unlock:
1. On the Applications Lcd, tap Settings.
2. Select Lock Lcd.
3. Then choose Screen lock.
4. Tap Face unlock.
Fit your face in the frame to be captured. Then, set a backup unlock PIN or pattern to unlock the Lcd in case the face unlock fails.
Setting a face and voice unlock:
1. On the Applications Lcd, tap Settings.
2. Select Lock Lcd.
3. Then choose Screen lock.
4. Tap Face and voice.
Fit your face in the frame to be captured and then set a voice command. Then, set a backup unlock PIN or pattern to unlock the Lcd in case the face and voice unlock fails.
Setting a pattern:
1. On the Applications Lcd, tap Settings.
2. Select Lock Lcd.
3. Then choose Screen lock.
4. Tap Pattern.
Draw a pattern by connecting four dots or more, and then draw the pattern again to verify it. Set a backup unlock PIN to unlock the Lcd when you forget the pattern.
Setting a PIN:
1. On the Applications Lcd, tap Settings.
2. Select Lock Lcd.
3. Then choose Screen lock.
4. Tap PIN.
Enter at least four numbers, and then enter the password again to verify it.
Setting a password:
1. On the Applications Lcd, tap Settings.
2. Select Lock Lcd.
3. Then choose Screen lock.
4. Tap Password.
Enter at least four characters including numbers and symbols, and then enter the password again to verify it.
How to Upgrade With the Latest Software
Keeping your device updated with the latest software fixes bugs on your handset thus contributing to its efficiency and life span. Samsung allows you to install those updates in two ways- through Samsung Kies or Over-the-Air. Well heres how you can install those latest software firmware using this two methods.
Upgrading with Samsung Kies
1. First launch Samsung Kies.
2. Then connect your phone to the computer using the USB cable that came with it.
3. Now Samsung Kies will automatically recognizes your device and a dialogue box
appears showing the available updates, if any.
4. Click the update button in the dialogue box to start upgrad ting to te latest software.
While youre upgrading the device, you shouldnt turn off the computer or disconnect
te USB cable and dont connect other media devices to the computer as it may interfere
the upgrading process.
Upgrading over-the-air
1. Go the Applications Lcd and then tap Settings.
2. Then go to About device.
3. Select Software Update then hit on Update.
How to Make Your Device a Portable Wi-Fi Hotspot
Smartphones these days can now share its mobile data connection and act as a portable Wi-Fi hotspot. And like those high-end gadgets, Samsung Galaxy S3 Neo+ is sure to let you experience the benefits of making it as a portable Wi-Fi hotspot. Heres how you can make your Samsung phone the next Wi-Fi hotspot.
1. On your device, go to Settings Lcd first.
2. Then tap Wi-Fi and tap
for more options.3. Select Advanced options to customize your Wi-Fi settings.
4. Go to Tethering and portable hotspot.
5. And choose Portable Wi-Fi hotspot to share the devices mobile network connection.
And you now have a portable Wi-Fi hotspot using your device.
How to Activate and Use Multi Window Feature
Computers allow us to do multi tasking by letting its users open various windows or Lcds to work on. Now if you think your phones display is too small for another Lcd, then you are indeed underestimating what your phone can do. With Samsung Galaxy S3 Neo+, you can still carry on with your multi tasking skill by working on not just one window but two Lcds at the same time. Heres how you can activate and use the Multi Window feature on your device.
1. To activate the Multi Window feature on your phone,go to the Applications Lcd first.
2. Then tap on Settings.
3. Go to Display and tick Multi Window.
4. To use the Multi Window just tap and hold
and the Multi Window panel appears at the left side of the Lcd.5. Now select one app and drag another app to a new location. Just drag the bar between the application panels up and down to adjust the panel size.
6. Tap the panel handle to hide or show the panel.
7. To move an open panel, just tap and hold the handle and drag it to an edge of the Lcd.
8. When a panel is hidden, tap and hold the handle and drag it up or down or left or right to move the handle.
9. To deactivate Multi Window, tap and hold
again.Take note that when this feature is activated, only applications on the Multi Window panel can run. When launching applications which contains multimedia files such as music and video, sound from both files will be played. And this feature may not be available depending on your region or service provider.
Apps developers are remarkably making good money out of every apps they build. No wonder online stores are mostly visited by smartphone users just to check on the hottest new apps online. If youve found the perfect app for your Samsung Galaxy Grand, then follow these steps in installing and perhaps uninstalling those unwanted apps.
Installing apps
1. First tap on Play Store on the applications Lcd to view available apps online.
2. You can browse available apps by category or simply tap to search with a keyword.
3. Then select an application to view. To download it on your phone, tap Install. Make sure to double check the app info like its price and ratings before hitting the install button.
4. If theres a charge for that app,tap the price and follow the onLcd instructions to purchase it.
5. To install apps that are from other sources, just go to Applications > Settings > Security > Unknown sources.
Uninstalling apps
1. In uinstalling the apps purchased from the Play Store, tap
2. Then go to My Apps.
3. And select an application you want to delete, then tap Uninstall.
How to Use S Voice
With the S Voice application you can use your voice to perform operations that you would normally have to do by hand such as dialing a phone number, texting a message, playing music, etc.
1. From the Home Lcd, tap Apps ➔ S Voice or the Microphone icon.
2. Read the Samsung Disclaimer then tap Confirm to continue.
3. Read the Vlingo Terms of Service then tap Agree to continue.
4. Read the information on the About S Voice Lcd, then tap Next.
5. Read the information on the Say what you want Lcd, then tap Next.
6. Read the information on the Wake up S Voice Lcd, then tap Next.
7. Read the information on the What Can I Say? Lcd, then tap Finish.
8. At the S Voice Lcd, say “Hi Galaxy” to wake up S voice.
9. Speak into the phone and follow the on-Lcd instructions.
How to Activate Direct Call and Smart Alert
The Motion settings allow you to set up various Motion activation services. For more information on using gestures.
1. From the Home Lcd, tap ➔ Settings ➔ Motion.
2. Tap Motion activation to activate the feature. A checkmark is displayed.
3. The following options are available. Tap the ON/OFF icon to activate each option.
• Direct call: Once enabled, the device will dial the currently displayed on-Lcd Contact entry as soon as you place the device to your ear.
• Smart alert: Once enabled, pickup the device to be alerted and notified of you have missed any calls or messages.
Installing apps
1. First tap on Play Store on the applications Lcd to view available apps online.
2. You can browse available apps by category or simply tap
to search with a keyword.3. Then select an application to view. To download it on your phone, tap Install. Make sure to double check the app info like its price and ratings before hitting the install button.
4. If theres a charge for that app,tap the price and follow the onLcd instructions to purchase it.
5. To install apps that are from other sources, just go to Applications > Settings > Security > Unknown sources.
Uninstalling apps
1. In uinstalling the apps purchased from the Play Store, tap
2. Then go to My Apps.
3. And select an application you want to delete, then tap Uninstall.
How to Use S Voice
With the S Voice application you can use your voice to perform operations that you would normally have to do by hand such as dialing a phone number, texting a message, playing music, etc.
1. From the Home Lcd, tap Apps ➔ S Voice or the Microphone icon.
2. Read the Samsung Disclaimer then tap Confirm to continue.
3. Read the Vlingo Terms of Service then tap Agree to continue.
4. Read the information on the About S Voice Lcd, then tap Next.
5. Read the information on the Say what you want Lcd, then tap Next.
6. Read the information on the Wake up S Voice Lcd, then tap Next.
7. Read the information on the What Can I Say? Lcd, then tap Finish.
8. At the S Voice Lcd, say “Hi Galaxy” to wake up S voice.
9. Speak into the phone and follow the on-Lcd instructions.
How to Activate Direct Call and Smart Alert
The Motion settings allow you to set up various Motion activation services. For more information on using gestures.
1. From the Home Lcd, tap ➔ Settings ➔ Motion.
2. Tap Motion activation to activate the feature. A checkmark is displayed.
3. The following options are available. Tap the ON/OFF icon to activate each option.
• Direct call: Once enabled, the device will dial the currently displayed on-Lcd Contact entry as soon as you place the device to your ear.
• Smart alert: Once enabled, pickup the device to be alerted and notified of you have missed any calls or messages.

Samsung Galaxy S3 Video Resulation problem Solution

Monday, August 25, 2014
How to update Galaxy s3
How to update the Samsung Galaxy S3 to the latest firmware version.
For smart phones have been around as long as there are always updates to their software. Phone manufacturers are always eager to get new products out to the hungry audience waiting for the next big thing to reach the mobile market. As a consequence, the phone will almost always be put up for sale before the habits and the error has been taken out of the system. As a way to fix the phone maker will from time to time need to update the firmware to the phone. In most cases these updates will appear on your phone when the time is right, but for those who do not want to wait a few seconds longer than necessary is no way to check for the upgrade manually. It will also work for the American version: SGH-I747, SGH-I535, SGH-T999, s III, I9305.

If you are looking for an update for the Galaxy s4 check out our Galaxy s4 update tutorial.
If you have bought the SG3 you already have the best cell phone there is. If you want to make it even better follow the instructions below.
First a small warning! Although updating your phone to the latest firmware should not entail any risk there is a small chance that some of your data could get lost. This is why there is always a good idea to backup data that is irreplaceable.
Now to the good part:
- Make sure your phone is connected to wi-fi. Simply pull down the notification area and press the leftmost button named Wi-Fi. Alternately you could do this using mobile data but this could get expensive if you are not on a data plan with your operator.
- Press the apps icon to take you to your apps.
- Find and press the settings icon to take you to the settings menu.
- Scroll down to the bottom of the screen and press the About Device.
- At the top there is a tab named Software update, press it.
- On the next screen there is a tab named Update, press that one.
- Your phone will now connect to the Samsung servers and if there is a update available the upgrade should start imminently.
- useful, why not
Mengapa update firmware Untuk membuat ponsel Anda ke ponsel terbaik dapat selalu membayar untuk memilikinya berjalan pada versi terbaru sejak produsen memperbaiki dan men-tweak perangkat lunak untuk memilikinya bekerja sebagai halus dan seaman mungkin. Alasan lain yang baik untuk menerapkan pembaruan khusus ini adalah bahwa ada rumor bahwa ini adalah salah satu yang membuat Galaxy s3 Anda siap untuk update besar untuk Jelly bean android 4.1 Beberapa artikel menarik lainnya mengenai hal ini adalah meng-upgrade ram Galaxy s3 Galaxy s3 Jelly kacang ditetapkan untuk Q4 2012 UPDATE
Friday, August 22, 2014
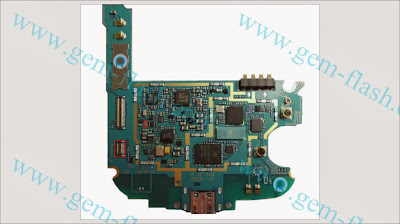
Samsung Galaxy S3 Insert Sim Ways fix problem
Monday, August 18, 2014
Galaxy S3 Custom ROM SuperNexus Turn S3 Into Nexus 4
Galaxy S3 Custom ROM ( SuperNexus )- Turn S3 into Nexus 4 - LG Nexus 4 is that the Google is Google’s fourth Nexus-branded android smartphone that was designed with and made by LG physics. Nexus 4 was launched with the new android 4.2 software package and featured with a 1.5 rate quad-core flower S4 professional processor, 2 GB of RAM, 8 or 16 GB of internal storage.

I still not get the Nexus 4 android phones, however here is that the custom memory board that special style for international Galaxy S3 GTi9300 phones. this tradition memory board can amendment your Galaxy S3 UI and Navigation still look same as Nexus 4. Besides this, this tradition memory board supported android 4.1.2 microcode conjointly was style for higher performance , additional new perform and options.
Here is the summary of the ROM Features:

Here is the summary of the ROM Features:
- Fully Deodexed
- Zipaligned APKs
- Rooted (Super SU)
- BusyBox Installed
- No 3rd Party App
- ZERO Bloatware
- Android Source Code vastly improved and optimized (i.e. Bionic, Dalvik, Webkit, Framework, libcore, SQlite etc)
- Official Jelly Bean Bootanimation (From Official Galaxy Nexus Android 4.2.1 Factory Image)
- Init.d Support
- Rsync Support
- UserInit Support
- Bash & Nano Support
- Native SIP/VOIP Support
- OpenSSH Support (ssh, sshd, scp, stfp)
- HSPA+ Support
- OpenVPN Support
- EXT4 File System Optimizations
- Galaxy S III Device Settings As An App
- Large APN & SPN List
- Options for switching between USB Mass Storage and MTP/PTP (On Specific Devices)
Framework Features:
Note: Flash or modified Galaxy S3 firmware will void the phone warranty. Method below is only for your reference and only for the international Galaxy S3 GTi9300. Try it on your own risk.
Step1 : Your Galaxy S3 must get Root access and install CWM Recovery. You can refer tutorial here on how to root Galaxy S3. Step flashing this custom ROM will wide all your phone data, so made a proper backupbefore proceed to step as below.
Step2 : Super Nexus(.zip) custom ROM from the developer link.
Step3: Power off your Galaxy S3.
Step4: Boot into Recovery Mode by press the Power Button + Volume Up Button +Home Button.
Step5: Now you are boot into CWM Recovery Mode. Then you need perform Wipe cache partition, wipe data and factory reset.
Step6: Now, go to install zip from SDCard > Choose zip from SDCard > Super Nexus(.zip)> Yes – Install Super Nexus(.zip).
Step 7: The flashing process is start.
Step 9: Reboot your phone after installation complete.
- Extended Power Menu (Reboot, Recovery, Download & Screenshot Options)
- Improved Scrolling Cache
- Tweaked Animation Values Of Progress Spinners (Silky Smooth Loading Spinners)
- Enabled Rotation Lock Tile in Quick Settings for Phones (Previously was only enabled on Tablets)
- Increased Lockscreen Widget limit from 5 to 9
- Enabled Copy/Paste in Gtalk
- Burst Shot (Up to 20 Images at once)
- ISO Mode
- Touch Focus Duration
- Power Shutter (Click Power Button To Capture Image/Video)
- Color Effects
- Shutter Timer
- Zero-Shutter Lag (On Specific devices)
- Touch-to-focus timeout duration settings
- Volume button zoom controls to camera and camcorder
- Browser Features:
- Increased Maximum Tab limit from 16 to 64
- Incognito Tab Option (When long pressed on an URL)
- Option To Close All Tabs With One-Click
- Allowed Any Type Of File To Be Downloaded
- Enabled WebGL (Ultra smooth browsing)
- T9 Dialer Support
- Landscape Dialer Support
- Transparency To Incall Screen
- Noise Suppression
- Allowed Installation Of Apps From Unknown Sources By Default
- Allowed Any Type Of File To Be Sent/Received Via Bluetooth
- Disabled Data Roaming By Default
- Removed Google’s Software Updates Option from Settings
- Enabled Gesture Input By default
- Hardware Information of the device (Settings>About Device>Hardware Information)
Note: Flash or modified Galaxy S3 firmware will void the phone warranty. Method below is only for your reference and only for the international Galaxy S3 GTi9300. Try it on your own risk.
Step1 : Your Galaxy S3 must get Root access and install CWM Recovery. You can refer tutorial here on how to root Galaxy S3. Step flashing this custom ROM will wide all your phone data, so made a proper backupbefore proceed to step as below.
Step2 : Super Nexus(.zip) custom ROM from the developer link.
Step3: Power off your Galaxy S3.
Step4: Boot into Recovery Mode by press the Power Button + Volume Up Button +Home Button.
Step5: Now you are boot into CWM Recovery Mode. Then you need perform Wipe cache partition, wipe data and factory reset.
Step6: Now, go to install zip from SDCard > Choose zip from SDCard > Super Nexus(.zip)> Yes – Install Super Nexus(.zip).
Step 7: The flashing process is start.
Step 9: Reboot your phone after installation complete.
Wednesday, August 13, 2014
How to update Android 4 4 2 KitKat Cyanfox ROM For Verizon Galaxy S3 SCH I535
Update Verizon Galaxy S3 SCH-I535 for the latest and best adapted KitKat Android 4.4.2 is now possible with Cyanfox 2.0.1 custom ROM. Google recently introduced the Android 4.4.2 Nexus KitKat on various models but builds are not much customized. Cyanfox v2.0.1 is based on the latest Android 4.4.2 build using the KitKat and CM11 sources. The bottom line is a major concern Cyanfox ROM, lighter-weight than most other Android aftermarket firmware. Officers Cyanfox 2.0.1 custom ROM currently support Verizon Galaxy S3 SCH-I535. You can download and install a custom firmware 2.0.1 Cyanfox

on your Verizon Galaxy S3 SCH-I535. Because, Verizon SCH-I535 Galaxy S3 is capable enough to run Android 4.4.2 KitKat smoothly, Cyanfox 2.0.1hal this will be a great experience for you. In addition to light other key features of the Android 4.4.2 ROM is based KitKat theme chooser, dark UI, Navbar, status bar and navbar customization and screen recording. To learn how to flash this ROM, s continue reading this guide to find out how to install Android 4.4.2 based custom ROM 2.0.1 Cyanfox KitKat on Verizon Galaxy S3 SCH-I535...
Android 4.4.2 KitKat some cool features that you will enjoy is the Screen Recording, Click to Pay (Google Wallet to all people), NFC emulation for non-NFC devices, 14% use less memory, cloud printing from the Gallery, Google is the new Home Launcher , Core System process use, efficient and responsive applications on all devices, the memory usage of all the new tool procstats details, Immersive full-screen mode, change the resolution for seamless media playback, phone dialer gets detection of local businesses, and many redesigned Quickoffice again.
As said already, this is a test build and you should expect some bugs in it. All bugs and problems are expected to remain as the construction progress toward building a better
Warning!
This tutorial is only for Verizon Galaxy S3 SCH-I535. Don’t try this guide on any other Android device. Also, we are not responsible for any damage caused due to the instruction given in this page. Try this at your own risk. However, it is very unlikely that your device will be damaged if you follow all the instructions as it is which are mentioned in procedure.
Pre Requisites:
1. Backup your device data.
2. Make sure your device have at least 60% battery power. You can install an app like Battery Notifier BT Free on your Android device to check it easily.
3. You already have USB Driver Installed for Verizon Galaxy S3 SCH-I535 in your PC. Download USB Drivers
4. Make sure USB Debugging is enabled otherwise you won’t able to transfer file between PC and Verizon Galaxy S3 SCH-I535.
5. Your device have latest CWM version 6.0.4.4 and up or TWRP 2.6.3.0 and up installed.
If you done everything that we mentioned above then you are ready to follow step-by-step guide on how to install Android 4.4.2 KitKat based Cyanfox 2.0.1 ROM on Verizon Galaxy S3 SCH-I535.
File Required(Download by clicking on it)
Cyanfox 2.0.1 For Verizon Galaxy S3 SCH-I535 [Filename: CyanFox-2.0.1-d2vzw.zip]
Google Apps [Filename: CyanFox-Gapps-2013-12-15.zip]
How to Install Android 4.4.2 KitKat based Cyanfox 2.0.1 ROM on Verizon Galaxy S3 SCH-I535
- Connect your device to PC using USB cable and then copy downloaded files to the SD card of your device.Important: Don’t extract any files.
- Disconnect USB and then turn off your Verizon Galaxy S3 SCH-I535.
- Now, boot into recovery mode. To do so, press and hold Volume Up, Home and Power button together until Samsung logo flash twice and then leave the button. You should see recovery menu soon. In recovery use Volume Keys to navigate between option and Power button to select an option.
- Perform a Nandroid backup of your existing ROM that you can restore later if this new ROM not work or you want to go back into your previous ROM. To perform a backup, select Backup and Restore, then on the next screen, select Backup again. Go back to main recovery menu after backup is complete.
- Now, perform data wiping task. To do so, select wipe data/factory reset, then select Yes on next screen to confirm your action. Wait few minutes till the data wipe is complete. Now come back to CWM recovery main menu. Select wipe cache partition and after wiping process done, select Wipe Dalvik Cache under advanceoption to perform Dalvik cache wiping.
- Select install zip from sdcard, then select choose zip from sdcard. Now, locate the Cyanfox 2.0.1 Zip file that you copied earlier in Step 1 and select it by pressing Power button. Confirm installation by selecting Yes – Install _____.zip on the next screen. The ROM installation will begin.
- Once the ROM installation process end, repeat the step 6 but choose the CyanFox-Gapps-2013-12-15.zipfile instead of ROM zip to install the Google apps package.
- When installation is completed, go back to the main recovery menu and select reboot system now to reboot your Verizon Galaxy S3 SCH-I535 and boot up into Android 4.4.2 KitKat ROM Cyanfox 2.0.1.
- Returning to Previous ROM: To go back to your previous ROM, boot into recovery, select backup and restore then restore your previous ROM by selecting it from the list.
Congrats! Android 4.4.2 KitKat firmware based custom ROM Cyanfox 2.0.1 is now installed and running on your Verizon Galaxy S3 SCH-I535.
Subscribe to:
Posts (Atom)
